[fusion_builder_container hundred_percent=”no” equal_height_columns=”no” menu_anchor=”” hide_on_mobile=”small-visibility,medium-visibility,large-visibility” class=”” id=”” background_color=”” background_image=”” background_position=”center center” background_repeat=”no-repeat” fade=”no” background_parallax=”none” enable_mobile=”no” parallax_speed=”0.3″ video_mp4=”” video_webm=”” video_ogv=”” video_url=”” video_aspect_ratio=”16:9″ video_loop=”yes” video_mute=”yes” video_preview_image=”” border_size=”” border_color=”” border_style=”solid” margin_top=”” margin_bottom=”” padding_top=”” padding_right=”” padding_bottom=”” padding_left=””][fusion_builder_row][fusion_builder_column type=”1_1″ layout=”1_1″ spacing=”” center_content=”no” hover_type=”none” link=”” min_height=”” hide_on_mobile=”small-visibility,medium-visibility,large-visibility” class=”” id=”” background_color=”” background_image=”” background_position=”left top” background_repeat=”no-repeat” border_size=”0″ border_color=”” border_style=”solid” border_position=”all” padding=”” dimension_margin=”” animation_type=”” animation_direction=”left” animation_speed=”0.3″ animation_offset=”” last=”no”][fusion_text]
First of all, we need to know that the flage heater can be divided into screw thread flage an plane flage. Then let’s see how to install the flage heaters.
[/fusion_text][fusion_text]
- The plane flage heaters
- Drill holes in the electirc heating containers first.(The diameter of holes are bigger than flage heater’s outer diameter.)
- Weld tubes outside the holes.(The diameter of the outer tubes is equal to the holes’ diameters.)
- Weld the parent flage to the outer tubes.(The parent flage is matched with the flage on heaters.)
- Finally, the two flage are fixed with screws, and add sealing rings in the middle of the two flage.
[/fusion_text][fusion_text]
See the installation diagram:
[/fusion_text][fusion_imageframe image_id=”615″ style_type=”none” stylecolor=”” hover_type=”none” bordersize=”” bordercolor=”” borderradius=”” align=”none” lightbox=”no” gallery_id=”” lightbox_image=”” alt=”” link=”” linktarget=”_self” hide_on_mobile=”small-visibility,medium-visibility,large-visibility” class=”” id=”” animation_type=”” animation_direction=”left” animation_speed=”0.3″ animation_offset=””]https://szheat.com/wp-content/uploads/2018/03/Flage-heater2-e1520902731172.jpg[/fusion_imageframe][fusion_text]
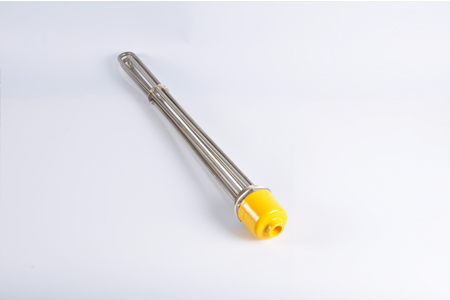
- The screw thread flage heaters (Srew thread & Counter screw)
[/fusion_text][fusion_text]
- Screw thread flage heater
- Drill holes in the electirc heating containers first.
- Weld the tooth rings outside the holes.(The tooth rings are matched with the screw thread.)
- Finally, directly twist the electirc heater on the tooth rings.
[/fusion_text][fusion_imageframe image_id=”616″ style_type=”none” stylecolor=”” hover_type=”none” bordersize=”” bordercolor=”” borderradius=”” align=”none” lightbox=”no” gallery_id=”” lightbox_image=”” alt=”” link=”” linktarget=”_self” hide_on_mobile=”small-visibility,medium-visibility,large-visibility” class=”” id=”” animation_type=”” animation_direction=”left” animation_speed=”0.3″ animation_offset=””]https://szheat.com/wp-content/uploads/2018/03/Flage-heater1.jpg[/fusion_imageframe][fusion_text]
- Counter screw flage heaters
- Drill holes in the electirc heating containers first.(The diameter of holes are equal to flage heater screw diameter.)
- Then put the screw thread part pass through the container from inside to outside.
- Finally, put the six angle nut screwed oh the thread of the electric heater with sealing rings.
[/fusion_text][fusion_text]
See the installation diagram:
[/fusion_text][fusion_imageframe image_id=”617″ style_type=”none” stylecolor=”” hover_type=”none” bordersize=”” bordercolor=”” borderradius=”” align=”none” lightbox=”no” gallery_id=”” lightbox_image=”” alt=”” link=”” linktarget=”_self” hide_on_mobile=”small-visibility,medium-visibility,large-visibility” class=”” id=”” animation_type=”” animation_direction=”left” animation_speed=”0.3″ animation_offset=””]https://szheat.com/wp-content/uploads/2018/03/Flage-heater3-e1520903056978.png[/fusion_imageframe][fusion_text]
We hope the simple diagrams can make you more convenient to opreate, if any questions or help, please contact us freely.
[/fusion_text][/fusion_builder_column][/fusion_builder_row][/fusion_builder_container]
Thanks a lot. If any help, please let us know without hestiation.